Home›Forums›Members’ Builds and Rides›VN – VP – VR – VS›The Equipe of Doom
This topic contains 40 replies, has 9 voices, and was last updated by ![]() Judge1 Frazer 6 years, 11 months ago.
Judge1 Frazer 6 years, 11 months ago.
-
AuthorPosts
-
April 13, 2015 at 10:06 pm #4688

MattyParticipant- New Zealand
- VS Equipe of Doom
View build HERE
Posts: 44By popular (well, 2 people) demand, I present the Equipe of Doom. Several people have expressed disbelief that I could possibly own such a weapon so here’s proof.Model: VS Equipe
Year: 1996
Colour: Whatchamacallit Silver
Engine: 3.8ltr V6 ECOTEC, supermang, speed holes in radiator and various pipes and gaskets.
Exhaust: 2.5 inch Exhaust, can’t-remember-but-possibly-Pacemaker headers ***EDIT: Nope, they’re Genies. ***
Gearbox: Standard 4L60E, kickdown flare ensures N-bombs on 3-2 downshift
Diff: Standard single smoker
Brakes: Standard, uprated pads, squeal
Suspension: KYB shocks up front, Monroe Gas at the rear, Kings V6 low at the rear, V8 low up front for that dog-with-worms ass-dragging look.
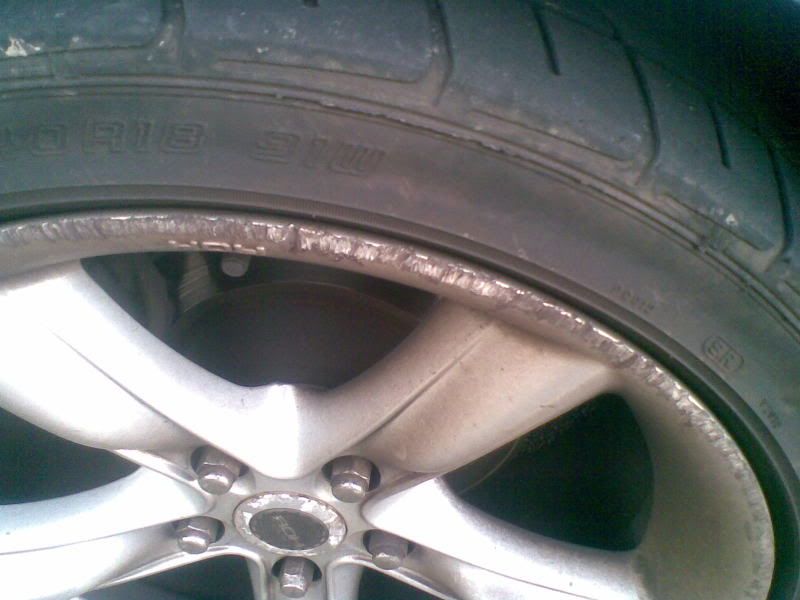
Wheels: 18″ ROH RT, brakedust coloured, extensive custom kerb-rash (special thanks to wife and mother-in-law)
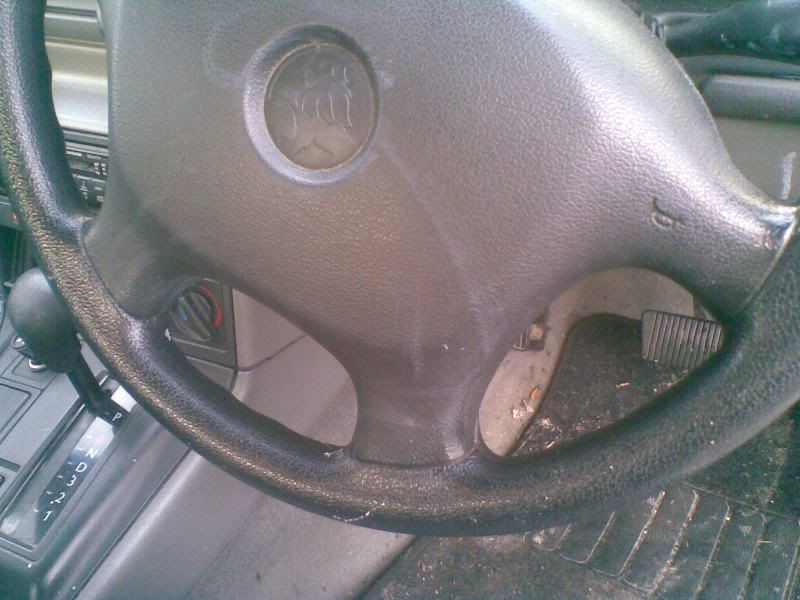
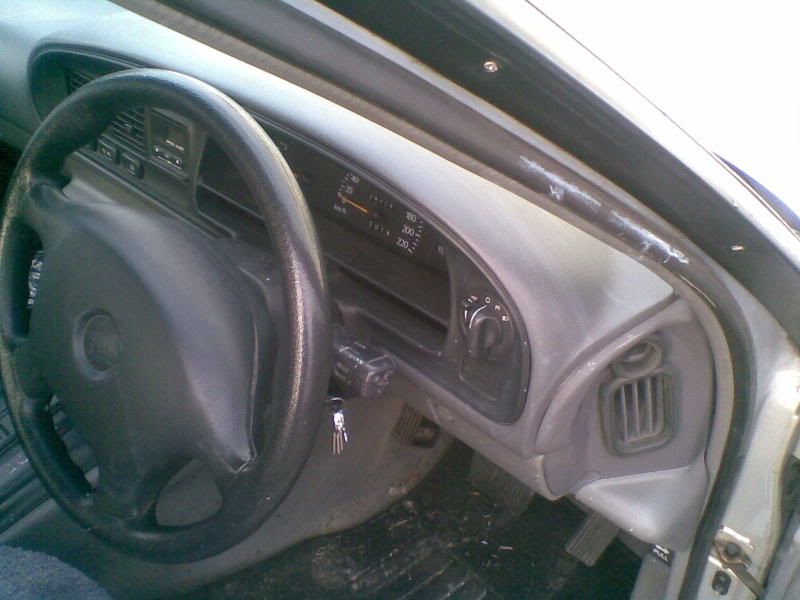
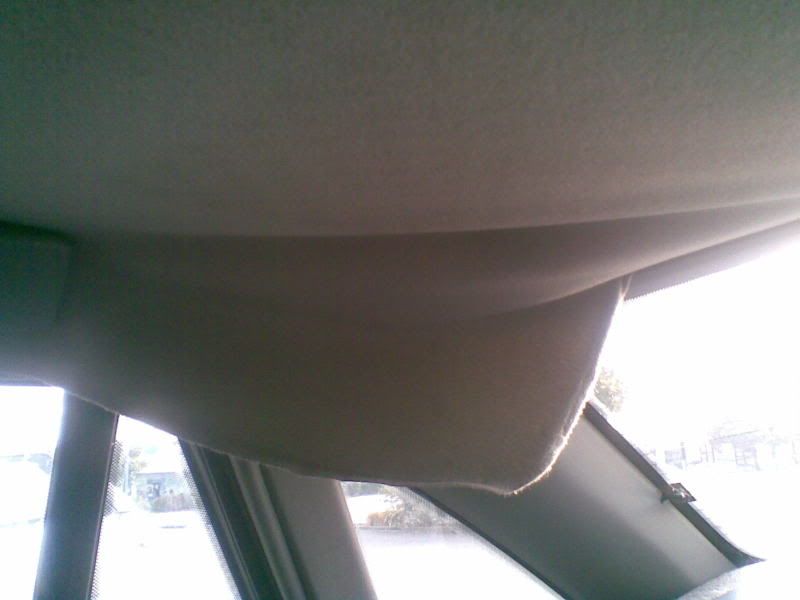
Interior: Standard, rooted, pagoda roof, Mexican whorehouse pin-retained headlining, selective trim removal, custom random painting
Other Mods: Many, many exterior speed dents, race tape security, thief-deterring illogical locking arrangement, self-removing tints, semi-automatic aerial etc.
Stereo: Stock, RF speaker faded to broken.
Future Mods: Theft/firebomb/crash
Contacts: Many parking poles, planters, kerbs etc
Trophies: GhettoNats 14 Grand ChampionA small selection of highlights:Custom interior painting:
Pagoda roof (took many years to get this right)
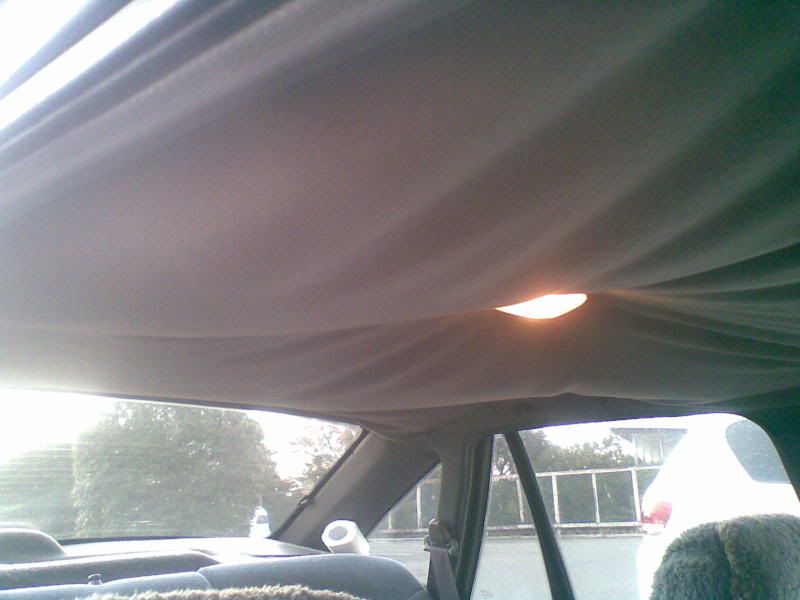
Some of the prized retaining pins
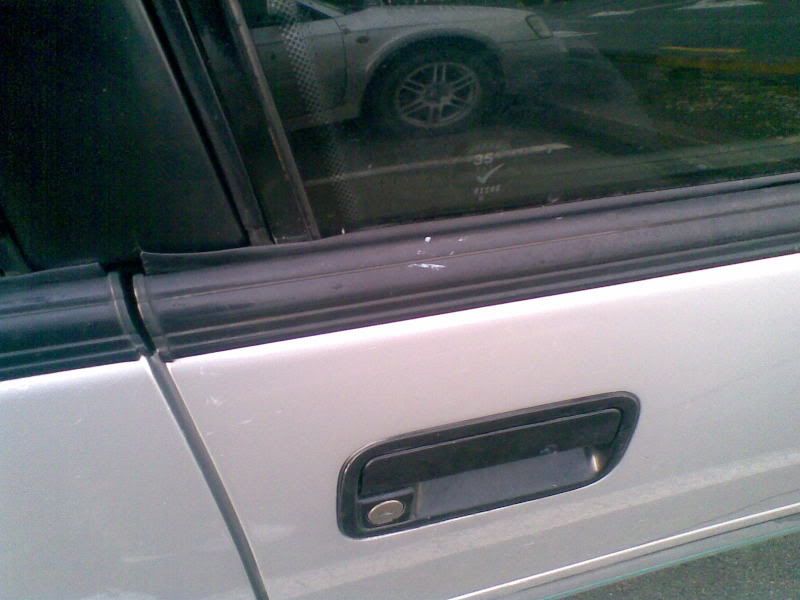
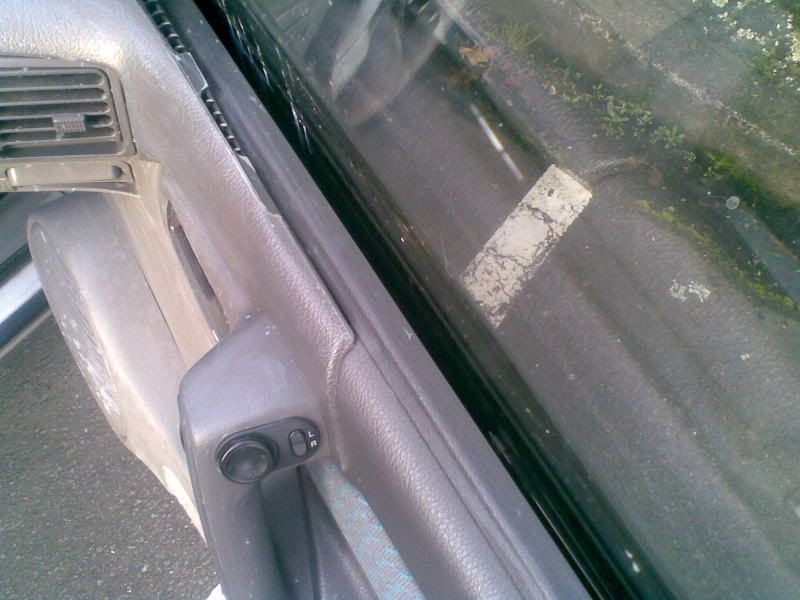
So prized my wife swiped some to make some curtains and never returned them! I punished her by impregnating her. Twice. Burn.Theft-deterrent. A bit hard to see in the pic but the locking tab is still up inside while the deadlock is on – note the key slot position. This seemingly impossible confluence causes the clearly insane thief’s head to explode. Note subtle housepaint detailing on window trim.
Custom rear bar mod. To achieve this awesome result you simply have to unhook a very heavy trailer then unload it with the drawbar raised and unsupported. Then when the weight goes off the back of the trailer, hey presto custom bar-o. Mean maori mean!
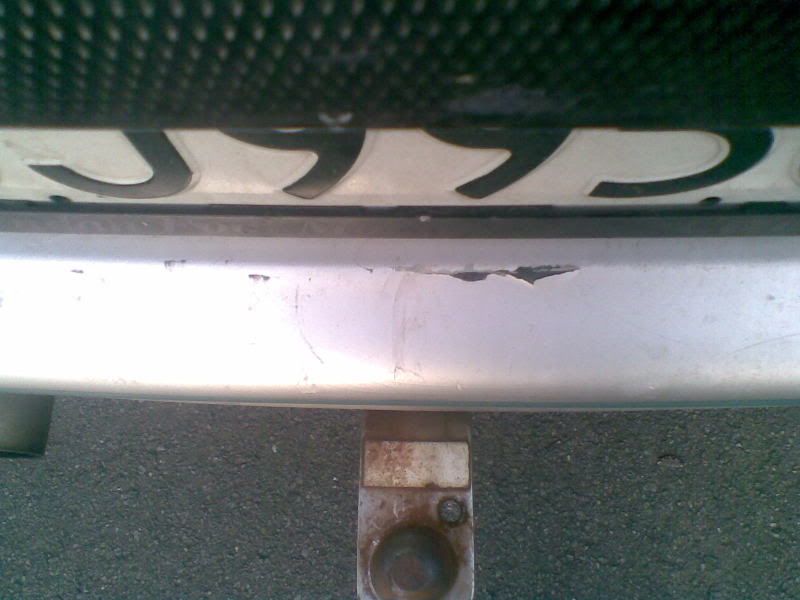
As you can see the tow bar has had its share of use.Mmmm…race tape….*drool*. Can never have too much race tape holding your rear bar on.
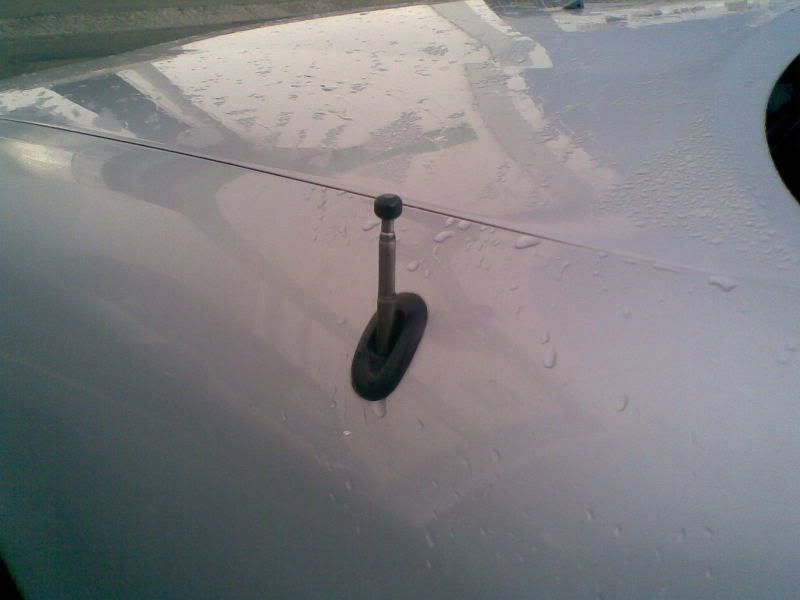
Semi-automatic aerial. To raise: Turn on radio. To lower: Turn off radio, wait for graunching noise to stop, get out of car, push aerial in the rest of the way.
April 13, 2015 at 10:11 pm #4689
MattyParticipant- New Zealand
- VS Equipe of Doom
View build HERE
Posts: 44BUT WAIT THERE’S MORE!
Kerb rash and custom brake dust wheel coating. Haven’t quite made it 360 degrees around every wheel but the mother-in-law is taking my kids to kindy in it tomorrow morning so should be completed then.
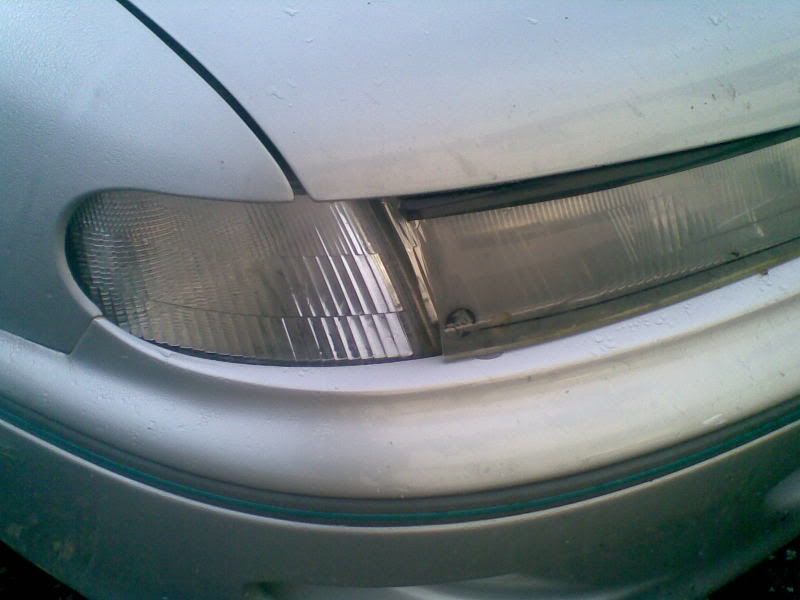
Dynamically trimmed OEM headlight covers. Light weight light fittings! OMG IT’S A FRICKIN’ RACE CAR BROOOOOOO!
What do you mean “not a race car”? Check out the partially stripped interior then hater boi.
Anyone wanting pics of custom Home Insulation Packaging boot trim or custom badly aligned passenger door, just ask. There’s many, many more mods than one man can remember. Chur.
-
This reply was modified 9 years, 8 months ago by
 Matty.
April 13, 2015 at 10:11 pm #4690
MattyParticipant- New Zealand
- VS Equipe of Doom
View build HERE
Posts: 44I notice it’s just started raining outside, which means I’m currently installing a pool in the boot. Pimp, I know, cheers.
This in turn will lead to a dynamic tal-light configuration that will most likely consist of a single brake light. The other lights may or may not feel like coming on. This represents excellent timing as I’ve just got off the phone with the mechanic I’m taking the car to tomorrow morning for its six-monthly Warrant of Fitness inspection.
April 13, 2015 at 10:13 pm #4691
MattyParticipant- New Zealand
- VS Equipe of Doom
View build HERE
Posts: 44*** EXPLOSMIC UPDATE!!! ***So rather than fill other parts of the forum up with stupid questions I thought I’d best contain them here. Things I’ve done since my last ramblings:
– Get the rear bumper fixed and repainted.
– Drop the trailer draw bar on the rear bumper again 2 months later.
– Swear, a lot, loudly.
– Discover my workshop manual uses VN-VP suspension for its guide, ergo forcing me to teach myself how the sway bar is connected. Fortunately the car is Jurassic and it’s all straight forward,
– Replace all the front bushes, radius rods, sway bar links and balljoints. Okay, one balljoint. More on that later.
– Replace the serpentine belt. Three times.
– Replace the tensioner arm.
– Replace the heater tap and a bunch of hoses.
– Replace the intake manifold gaskets.
– Replace the front brake discs and pads, because we found stopping on the backing plates was not only noisy and ineffective, it was also eating the discs at an alarming rate.
– Overtorque a calliper guide pin bolt by reading the wrong line in the manual.
– Replace calliper guide pins on one side. Other side will be done shortly.
– Remove and flush the radiator.
– Introduce transmission fluid and coolant leaks.
– Go through 4 litres of PS fluid.
– Replace the PS pump.I’m also currently running a lightweight slightly-angle-ground left-hand balljoint, as I ground out the old rivets before checking the supplied replacement balljoints and discovering I had two right-hand units instead. Much merriment ensued. I’ll replace that at the same time I do the left-side calliper guide pins.
…and so here we are today. Important question: Anyone know of an approximate torque value for the PS pump mounting bolts? My manual handily says to tighten them “securely” and I figured “approximately shitloads” was pretty secure. Sadly the bolt begged to differ and now I have a slightly wobbly pump held on by 1.5 bolts. I’m hoping there’s enough of the broken bolt exposed to get hold of it with some vice grips, but I fear Easy-outs and hours of swearing and drilling will instead be required.
I just take solace in the fact that at the end of all these trials and tribulations this baby will be worth a good $500-600 and she’ll be making a good 120whp or so while sipping a gentle 15l/100km.
-
This reply was modified 9 years, 8 months ago by
 Matty.
April 13, 2015 at 10:16 pm #4694
MattyParticipant- New Zealand
- VS Equipe of Doom
View build HERE
Posts: 44Right I’ve now got the car running a custom 5-rib drive belt. It’s an easy conversion. Here’s how.
1. Split the mounting thread on the alternator rear housing so the brace can’t be bolted on properly. You can achieve this by over-torquing the mounting bolt, and over time the crack will split off the rear half of the thread, conveniently disposing of the bolt at the same time. This will cause the alternator to move around ever so slightly.
2. Refit 6-rib drive belt.
3. Drive around for a few months.
4. Alternator will shuffle the drive belt forward, then trim that annoying 6th rib off with the leading edge of the pulley. It will also modify your bonnet lining with a 15-inch long rip.
5. ???
6. Get dem bishez!!As an added bonus the top idler pulley is unable to cope with so much awesome and squeaks and chatters regardless of how much CRC you drown it in. This means your car now emits a sound that says “MOVE ASIDE! FORMULA 1 ENGINEER APPROACHING!!” and everyone turns to stare in amazement at how so much epic can be contained in one vehicle.
I’m now looking to source a rear housing for the alternator (or maybe just a new alternator) so I can refit everything properly, I’m attracting so many women of loose morals with this modification my wife is threatening me with divorce so I’m going to have to revert to stock.
April 13, 2015 at 10:17 pm #4695
MattyParticipant- New Zealand
- VS Equipe of Doom
View build HERE
Posts: 44Couldn’t find a rear housing anywhere, for some reason people want to sell the whole alternator. Freaks. So I tracked down a new comedian yesterday, he works in the parts department at the local Holden stealership. $943 for a new alternator he says. I may have left a puddle of wee on the floor but couldn’t see it through the tears of laughter streaming down my face. $145 for a rebuilt one with a 2-year warranty instead thanks.
April 13, 2015 at 10:18 pm #4696
MattyParticipant- New Zealand
- VS Equipe of Doom
View build HERE
Posts: 44Well well well, what do we have here?http://farm3.staticflickr.com/2500/5729469680_b1833b51cf_b.jpgThat’s right folks, it’s something that will never grace the engine bay of the taxi. fml.
Anyway, I had a 4-day weekend so decided to have a hack at the broken bolt. I was overjoyed to discover the PS pump attaches to an easily-removed bracket, then subsequently overdepressed as I discovered the broken bolt passed directly through the bracket and into the front cover.
So I spent a while failing to get some vice grips to bite on the remains, then a bit longer failing to get a drill to bite as well. I forlornly gave the two tiny pieces of thread sticking out a flick with my fingers and lo and behold the damn thing turned. So I ended up removing the broken piece by hand. I Am Man, Hear Me Roar, or at least giggle and dance like a schoolgirl before composing myself.
Next step was to replace the radiator, and in order to ensure I kept my 100% record I snapped a bolt putting the shroud back on. Gives me something to do over Christmas.
I also replaced the water pump while I was in there, and sadly there are no leaks yet but it’s early days still and hope (and coolant) springs eternal.
I also discovered some nasty brown oil running from the side of the sump, and was about to ignite some fire lighters under the car when I noticed this was actually due to the lower trans line that runs from the cooler being perished, so the trans fluid was running along the underside of the hard line before dripping onto the top of the sump. I’ve cut up and put in a new hose for that and we’ll see how that goes.
With time to spare I employed my epic skills to replace the left-hand balljoint and calliper guide pins before doing a lap of victory around the section and noticing the steering wheel was now cocked to the left when the car was pointing straight ahead. Alignment ahoy.
Hopefully this will all stop the car from marking its territory wherever it goes, the paparazzi have cottoned on to it.
April 13, 2015 at 10:18 pm #4697
MattyParticipant- New Zealand
- VS Equipe of Doom
View build HERE
Posts: 44So help me out here folks, I seem to struggle to stem a couple of leaks, namely PS and trans fluids, which of course are the same oil. I had a bastard of a time with the low-pressure hose from the PS reservoir leaking, which I resolved over the weekend by double-clamping it with 2 hose clamps and a bit of RTV sealant at the very end. Now it seems my replacement for the lower trans hose to the rad is also leaking despite being double-clamped with new hose clamps and tightened with much vigour.
What am I doing wrong here? There’s only so tight I want to go with the clamps for fear of splitting the hard line. Is it going to be a case of smothering some sealant on the end of the hose again? I always use new clamps
April 13, 2015 at 10:19 pm #4698
MattyParticipant- New Zealand
- VS Equipe of Doom
View build HERE
Posts: 44It’s so much of an animal it marks its territory by p*ssing oil wherever it parks. It’s so gangsta after the balljoint replacement even the steering wheel leans to the left. Luca di Montezemolo rang the other day and offered me the Head of Engineering job at Ferrari and both his daughters, but since I’m already married I graciously declined.April 13, 2015 at 10:20 pm #4699I’m in A state of disbelieve at the shear amount of perfection this master piece possesses
April 13, 2015 at 10:20 pm #4700
MattyParticipant- New Zealand
- VS Equipe of Doom
View build HERE
Posts: 44It looks like the trans leak isn’t a leak after all, I think the drips were just the remains of the pool that was sitting on the sump running off because there was no new build-up last night. Well, either that or the trans is out of oil.
The bottom rad hose is leaking a tiny bit after replacing the rad but tightening the clamp a little more should sort that, and the hose to the overflow is sucking a little air because I stupidly pushed the line on too far so I’ll sort that too.
Sadly I still have a small leak from the low-pressure hose when it leaves the PS reservoir, which is killing me because I’ve double-clamped it AND put a bead of sealant around the end of the hose too. The hose and reservoir were both replaced last Christmas. I rubbed some more sealant around it last night so I’ll see how it goes tomight. The return hose seems to be leaking where it exits the hard line so I smooshed* some sealant around that too until I hit up the local $upercheap for a new hose and clamps, since they’re both 16 years old now.
April 13, 2015 at 10:21 pm #4701
MattyParticipant- New Zealand
- VS Equipe of Doom
View build HERE
Posts: 44I guess I should update this with the latest few fixes/mods. Note that the next major mod will involve the application of approximately 150 tons of pressure to the roof, but that will have to wait until after Winter. Revenge will be sweet.The PS leaks are finally sorted. All it took was a rounded nut and an enraged hurl of a ratchet handle, followed by a trip to the local wallet rapist to replace the return hardline. I now have a completely overhauled PS system, except for the rack itself. Interesting fact: number of PS return hard lines sitting in VS Commodores in Hawkes Bay, NZ: 0.I have also custom-modified the left rear window tint by applying the sharp corner of a fridge to it whilst pushing the fridge into the back seat. Did you know a fridge could fit into the back seat of a VS Commodore? Well it can. Eventually.
And now the latest drama: The mysterious “everything dies!” issue. A couple of times now when I’ve tried to start the engine it’ll very briefly turn the starter before…everything dies! All lights on the dash go out and turning it off again, pulling out and reinserting the key doesn’t do anything. The first time this occurred was 3 days ago, handily just after packing the groceries, which included fish and dairy products, in the boot.
I’ve discovered I can fix this issue by popping the bonnet, wiggling the battery terminals and the fuses and firing off a few choice swear words into the engine bay. It’ll then start up and run fine.
In the interests of a more permanent fix, what’s this likely to be? Dodgy immobiliser? Loose/corroded connection? Demon possession? A sign that it’s time to let go?
April 13, 2015 at 10:21 pm #4702
MattyParticipant- New Zealand
- VS Equipe of Doom
View build HERE
Posts: 44Oh and nearly forgot, the car is also now proudly marking its territory by leaking through the rear main seal. I’m taking the car for a 600km round-trip this week, hopefully the car will die along the way and I will survive.April 13, 2015 at 10:22 pm #4703
MattyParticipant- New Zealand
- VS Equipe of Doom
View build HERE
Posts: 44As a matter of fact I did take it to Powercruise in Taupo last year but I was turned away at the gate for running too much awesome.But yes it is indeed an animal on the street. Slugs are animals too.April 13, 2015 at 10:23 pm #4704
MattyParticipant- New Zealand
- VS Equipe of Doom
View build HERE
Posts: 44ohai.I fixed the “everything dies!” issue in a very technical manner. I took off each lead, stuck my finger in it and wiggled it around a bit, and now it starts fine every time. I fixed an ex-girlfriend like this too many years ago. Sadly I couldn’t work out how to fix the “batsh!t insane” issue she also had.
Current discussions with “She Who Controls the Marital Congress” centre around whether this car stays in our possession or we flog it and get something like an 80/100-series Landcruiser as we plan to buy a section and bankrupt ourselves growing something in a few years’ time. Obviously if it stays it’ll have to have a heart transplant. Stay tuned for facepalms.
April 13, 2015 at 10:23 pm #4705
MattyParticipant- New Zealand
- VS Equipe of Doom
View build HERE
Posts: 44Well, it’s dead.In a freak occurrence, despite the ongoing drought here water started falling from the sky last Tuesday in large quantities, and I suspect it’s shorted something out – we got 18.6mm of rain in an hour, or roughly the same amount we had over the previous 6 months. This also happened 3 years ago after a heavy downpour and it took 4 days to start again. The car smells damp inside, it’s lush.Easiest thing to do was to buy another car, which is exactly what I did. I went down to Wellington and picked up an M35 Stagea 350RX Four and it stole my heart with its grip, surprising amount of grunt (relative to the VS), luxury and ability to start.
And yet I still need to get the Equipe running again. It’s currently sulking in one corner of the car port, and my wife is determined it shall rise again like a phoenix from the ashes, whereas I would prefer to simply reduce it to ashes. However, not having a vagina of my own, I feel compelled to fulfil her wish.
It cranks over like a champ still but I can’t hear the fuel pump priming. The fuse is fine, and my wife thinks the pump was replaced a few years ago (she had the car to herself while I was away). I’m hoping the electrics have fried and turned it into a project car but I have to at least put in the effort first.
First thing to check is the fuel relay, right? Can I swap it with another relay to test it?
Would a faulty oil pressure switch stop the fuel pump priming?
Can I get some new tools out of this, like a multimeter or something?All my love,
Wibble.April 13, 2015 at 10:24 pm #4706
MattyParticipant- New Zealand
- VS Equipe of Doom
View build HERE
Posts: 44Well she’s completely dead now. Gave her a kick over on the weekend and the starter motor barely turned before the lights faded. Sigh. Now I have to decide whether to buy a battery that costs roughly half what the car is worth just so I can spend more money to find out why I should quit while I’m way behind.It’s kinda sad really, she’s given us so many years of faithful service despite being neglected. I’d shed a tear if I wasn’t an emotionless He-Man.
VR SS Chaser: I don’t get out much in public unfortunately, so my ramblings are generally kept to private forums and letters attached to bricks thrown through politicians’ windows. THAT WAS A JOKE ASIO! CALM DOWN!
But I digress. Further updates will depend upon how successfully my wife nags/withholds marital bliss.
April 13, 2015 at 10:25 pm #4707
MattyParticipant- New Zealand
- VS Equipe of Doom
View build HERE
Posts: 44Ok this thing is taking up space so I figured I’ve have a crack at it. Bought a multimeter and I have a touch under 10v at the fuel pump connector. I’m now trying to get the pump/sender assembly out to change the pump but I’m being held up by the clip on wht I believe is the return line that connects to the swirl pot.Searches are telling me to “just unclip” it but I’m buggered if I can figure out how. Since this is all going on about 5cm from my face (the car’s wedged in a corner so I can’t jack up the driver’s side) I can’t focus on the clip to see how it’s held together.I’m also super-high from the petrol fumes. WHEEEEEEEEEEEEEEEEEEEEEEEE!!!
fml.
-
This reply was modified 9 years, 8 months ago by
 Matty.
April 13, 2015 at 10:25 pm #4708
MattyParticipant- New Zealand
- VS Equipe of Doom
View build HERE
Posts: 44Never mind, just unclipped it. Somehow. Technique involved anger and a pair of pliers. No idea how it’ll go back on but meh. Short sentences. Wiicked.April 13, 2015 at 10:26 pm #4709
MattyParticipant- New Zealand
- VS Equipe of Doom
View build HERE
Posts: 44http://www.youtube.com/watch?v=xos2MnVxe-cTime of life: 8:27pm. Monday 08/07/2013.
One does not simply kill a Commodore.
-
AuthorPosts
You must be logged in to reply to this topic.

